Pay in installments of $7.21 with
 ,
,
 and
and

Shipping Estimate
USA
- USA
- CAN
- USA
- CAN
Ships within 48 hours · Estimated delivery Sep 30 - Oct 5
 Promo Codes Available:
For Your Every Summer RSVP, with Code: SUMMER15
Description
aloe vera online plant Aloe VeraIntroducing the fabulous Aloe Vera plant also known as Aloe barbadensis 'miller,' it is also known as a medicinal aloe and burn plant. The Aloe vera plant is by far the most popular out of over 400 varieties of the Aloe genus. This incredible tropical succulent is not your average houseplant. It's a superstar known for its leaves, which hold a magical aloe vera gel for soothing sunburn and as a popular drink to help your stomach. This large Aloe vera
Introducing the fabulous Aloe Vera plant- also known as Aloe barbadensis 'miller,' it is also known as a medicinal aloe and burn plant. The Aloe vera plant is by far the most popular out of over 400 varieties of the Aloe genus.
This incredible tropical succulent is not your average houseplant. It's a superstar known for its leaves, which hold a magical aloe vera gel for soothing sunburn and as a popular drink to help your stomach.
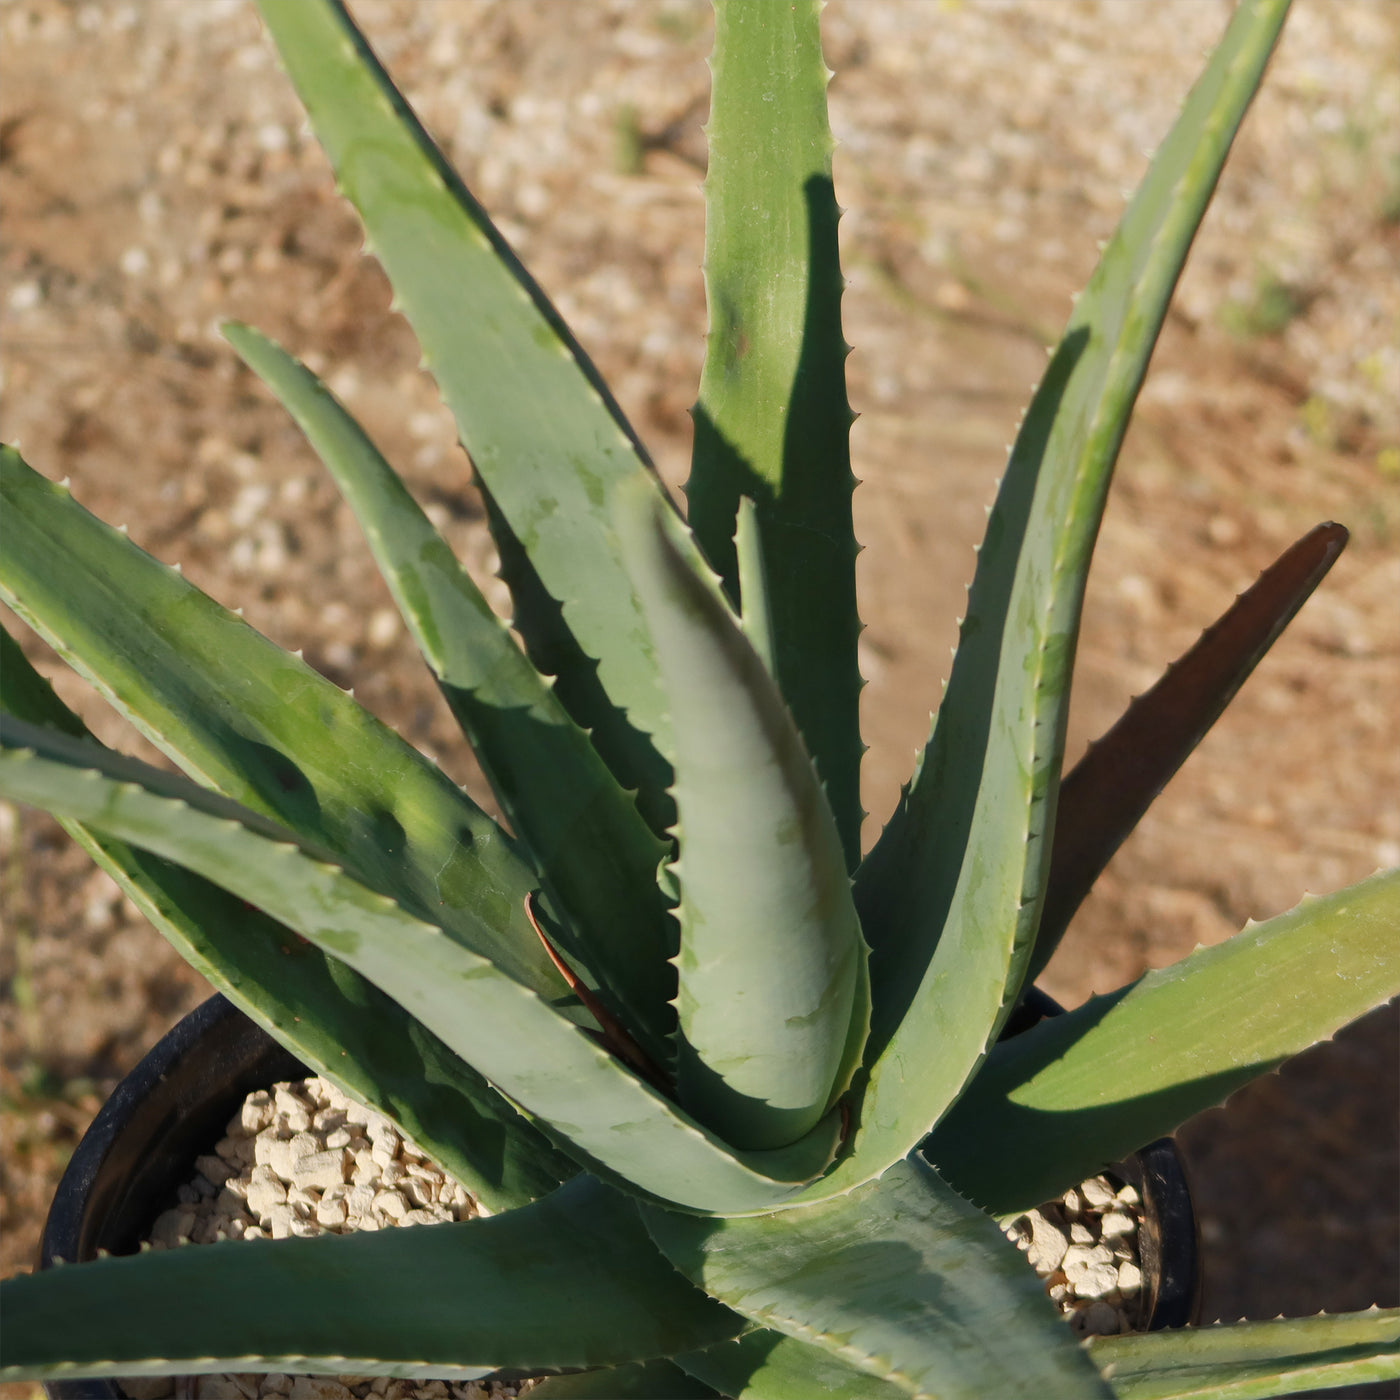
This large Aloe vera plant boasts fleshy lance-shaped grey-green leaves with small white teeth along the edges growing out from a starfish-like basal rosette.
The edible aloe vera flowers burst into bloom in vibrant shades of yellow at the tips of their stalks when given favorable conditions. Only mature plants will yield flowers, so you'll have to wait at least four years to see an aloe vera bloom. However, in some growing conditions (especially hybrid plants), the flowers can sometimes appear with orange or reddish hues.
This fast-growing succulent can grow into a large aloe vera plant up to 3 feet tall and 2 feet wide and even produce adorable pups that you can repot or share as delightful gifts with fellow plant enthusiasts.
How to Get Aloe Vera Gel from the plant to use on your skin
- Choose and Cut a Leaf: Select a large, healthy leaf from the bottom of the plant. Use a sharp knife to cut the entire leaf off at the base.
- Prepare the Leaf: Let the leaf sit upright in a container for 10–15 minutes to allow the yellow sap (aloin) to drain out. This sap can be irritating to the skin.
- Slice and Extract the Gel: For a small amount of gel, cut a section from the leaf rather than using the whole thing. Slice the leaf lengthwise to expose the gel. Use a spoon or knife to scoop out the clear gel.
- Apply or Store: Apply directly to your skin for soothing relief. Store extra gel in an airtight container in the fridge for a few days.
Aloe vera juice has many benefits for humans, this succulent rich in antibacterial, antioxidant, and anti-inflammatory properties, may enhance digestion, blood sugar levels, and oral health, although certain compounds, particularly aloin, may cause digestive discomfort and other side effects.
An aloe vera indoor plant is a great addition to any home, as it is easy to aloe vera care for and provides a variety of aloe vera benefits.
According to the American Academy of Dermatology, Aloe vera has anti-inflammatory properties that can help in wound healing. It can also help to moisturize the skin and prevent peeling.
When and How to Water Your Aloe Vera
As a desert dweller, watering the aloe vera succulent may be tricky, it may shrivel and die if given too little water, but it may also easily rot when given excessive water. So be careful not to overwater your aloe plant—you only want to give it enough to keep it from drying out completely, not drown it!
A good rule of thumb is to water the Aloe plants deeply and then allow the soil to dry out completely before watering again. In the spring and summer, during the growing season, watering can be done once every 2-3 weeks.
During the winter months, when aloe vera is in a dormant period, it can be watered even less frequently. If you live in a rainy climate, consider planting aloe in gravel or stones.
It is also important to note that aloe vera plants are sensitive to water quality. They prefer water that is low in minerals and salts, so it is best to use distilled or filtered water. Tap water can be used, but it should be left out for 24 hours before watering the plant to allow the chlorine to evaporate.
Light Requirements - Where to Place Your Aloe Vera Plant
When growing indoors as a houseplant, place the aloe vera a few feet away from the south-facing window that receives plenty of sunlight, but it is important to avoid direct sunlight, as this can cause the leaves to burn. If the aloe plant is not receiving enough light, the leaves will start to droop and turn brown. In this case, it may be necessary to move the aloe vera plant to a brighter location.
When planted outdoors, your Aloe plants need their daily dose of sunshine like a beach-loving teenager needs their favorite tunes!
They thrive on at least 6 to 8 hours of direct sunlight, soaking up those glorious rays with joy.
But wait, before you go dragging your aloe plant from its cozy shady spot into the blazing sun, be cautious. That sudden move can dry out your leafy buddy and leave it looking as yellow as a lemon.
Now imagine you live in one of those cooler climates where clouds have permanent residency or if your home lacks these sunny windows altogether.
Fear not; you can use artificial lights – they're like little suns in bulb form! Hang them about one to two feet above your precious plant during daylight hours (that's roughly 16 hours per day) and watch it flourish happily amidst dim interiors.
Optimal Soil & Fertilizer Needs
Aloe vera plants prefer well-draining soil that is a mixture of sand, perlite, and peat moss. It is critical to avoid soil that retains excessive moisture, as this can cause root rot. Instead, make or buy a well-draining potting mix, or ideally use our specialized succulent potting mix soil for aloe vera that contains 5 natural substrates and mycorrhizae to promote the development of a strong root system that helps your succulent to thrive.
In terms of fertilizer, aloe succulents do not require a lot of nutrients. They can be fertilized once a year in the spring with a balanced fertilizer (NPK) of 5-10-5 in ratio. It is important not to over-fertilize the aloe plant, as this can lead to root burn.
Hardiness Zones & More
When grown indoors as a houseplant, aloe vera plants prefer a warm and dry environment. They thrive in temperatures between 60°F and 80°F. Aloe vera is a succulent, so it's adapted to arid conditions and doesn't do well in overly humid environments. Aim for a humidity level of around 30% to 40% for your indoor aloe vera plant.
In the United States, this is mostly an indoor plant, but if you live in southern Florida or Hawaii then you can cultivate it outdoors in USDA zones 9-11
Aloe vera can tolerate temperatures as low as 40°F for short periods, but prolonged exposure to freezing temperatures can damage or kill the plant. If you live in a colder climate, it's best to keep your aloe vera indoors or provide protection during winter months.
Aloe vera plants prefer dry air and do not require high levels of humidity. They can tolerate low humidity levels and do not need to be misted or placed in a humid environment.
Wildlife - Aloe Vera Attracts the Following Friendly Pollinators
Aloe vera plants attract a variety of friendly pollinators, including bees, butterflies, and hummingbirds. These pollinators are essential for the reproduction of aloe vera plants, as they help transfer pollen between flowers, ultimately leading to the production of seeds. Additionally, these pollinators play a crucial role in maintaining biodiversity and ecosystem health.
According to the ASPCA, the Aloe vera can be mildly toxic to pets and humans. It is rare but can occur if consumed in large quantities and can cause abdominal cramps, diarrhea, and electrolyte imbalances. It is important to consult a healthcare professional if you experience any adverse effects from consuming aloe vera.
How to Propagate Your Aloe Vera Plant
To propagate your aloe vera plant, you can separate the offsets or "pups" that grow at the base of the main plant. Gently remove these pups and plant them in their own pots with well-draining soil to encourage root growth. Water sparingly until they establish themselves, and place them in a sunny spot to promote healthy growth.
Aloe Vera: The Natural Sunburn Remedy
Aloe vera gel is known for its ability to moisturize the skin, it helps soothe burns and sunburns, as well as being known for its anti-inflammatory and antibacterial properties.
Aloe Vera is also rich in vitamins and minerals that are essential for healthy skin. It is best to use pure aloe gel extracted directly from an aloe vera plant.
To use aloe vera gel to soothe sunburns, cut off a piece of the large aloe vera leaf and open it to reveal the gel.
To maintain the aesthetic appeal of your aloe plant, it is advisable to cut off the entire leaf of the large aloe vera plant when cutting one. Just chop the leaf off as close to the main stem as you can. Cutting leaves from the base of the plant is always preferable. These leaves will be thicker since they are older. If you cut off the tip of a leaf, it will eventually turn brown at the tip because cut leaves keep their scars.
Key Takeaways
- Aloe vera is renowned for its medicinal properties, particularly its soothing gel, which is widely used for treating burns, wounds, and skin irritations. Its natural compounds, like aloin and acemannan, have anti-inflammatory and healing properties.
- When cut, aloe vera can seal its own wounds by producing protective latex, showcasing its remarkable survival mechanism in harsh environments.
- Aloe vera is not just a skincare savior; it also purifies indoor air by removing harmful pollutants like formaldehyde and benzene, making it a great addition to homes and offices.
- Native to arid regions, aloe vera thrives in minimal water conditions. It stores water in its thick, fleshy leaves, allowing it to endure prolonged droughts.
- The inner gel of aloe vera leaves is edible and used in drinks and food for its health benefits, such as aiding digestion, boosting immunity, and providing hydration. Always ensure proper preparation to remove any bitter or toxic compounds.
- The presence of yellow flower buds is a strong indicator of the edible variety.
The Bottom Line
Overall, Aloe vera is a popular plant known for its healing properties and versatility. It has gained popularity for its ability to help heal wounds, cuts, and burns, including sunburns. The gel inside the aloe vera leaves contains soothing and moisturizing properties that can provide relief and promote healing. In terms of care, aloe vera is relatively low-maintenance. It thrives in well-draining soil and requires moderate watering. It prefers bright, indirect sunlight but can tolerate some shade.
A lot of people have a hard time finding large aloe vera plants, but here at Planet Desert, we regularly have large sizes in stock. Don't miss out on adding an Aloe vera plant for sale to your garden! Order now and enjoy its beauty for years to come.
Shipping Notes
- Free Standard Shipping on $100+ Orders to the USA.
- Except Preorder products are shipped in 48 hours.
- Delivery to the USA:
- Standard Shipping : 3-10 business days
- If time is of the essence, please consider selecting expedited delivery for faster service.
Exchange/Return Notes
- We offer a 30-day return/exchange service after receiving.
- Final sale items are not eligible for returns or exchanges.
- To process your return/exchange, please contact us at [email protected]
- Please click here for more details>>> Return & Exchange Policy